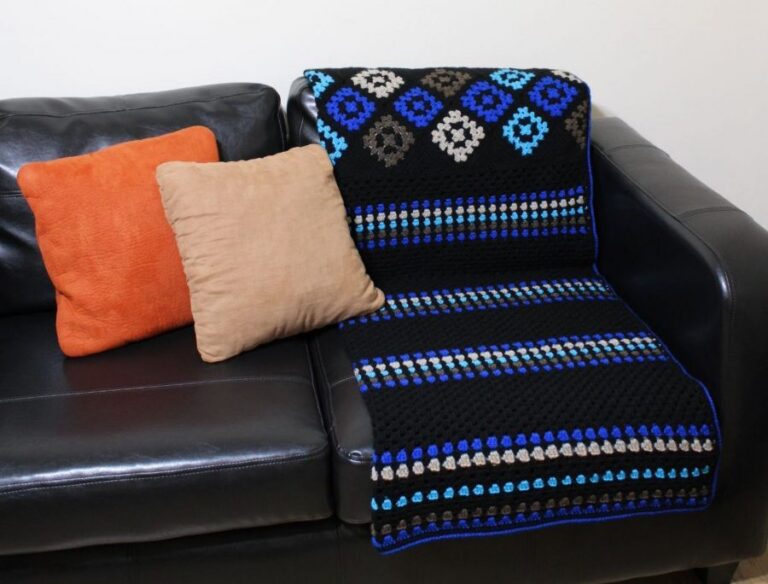
Grampy Blanket (Part I)
This blanket was my first crochet design ever! I am super happy that I can share it with you now that it was conveniently tested.
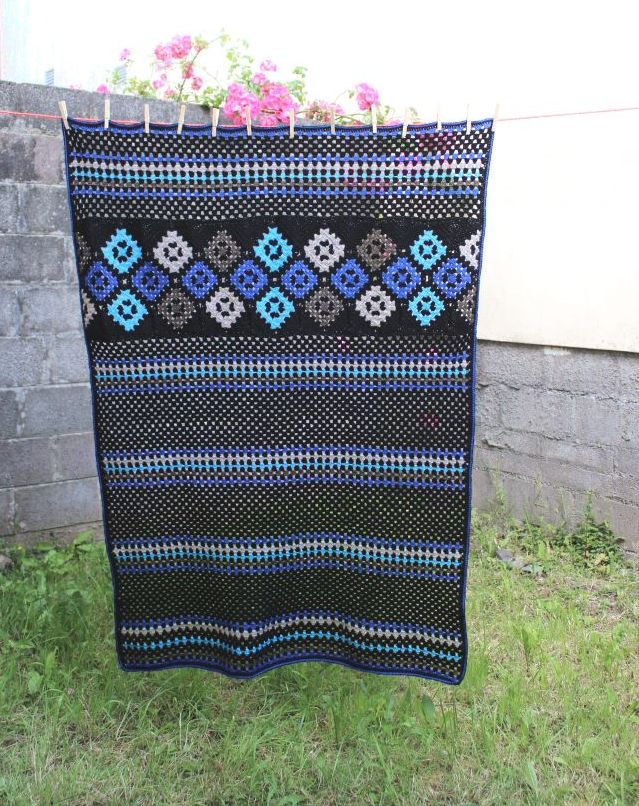
Having spent a part of my life ignoring the rainbow, this crochet blanket was perfect to practice some colour combinations with black. This needed to be the main colour and it is served as a base to make all the other colours pop up.
This design is a link between vintage and modern, giving charm in any space of the house.
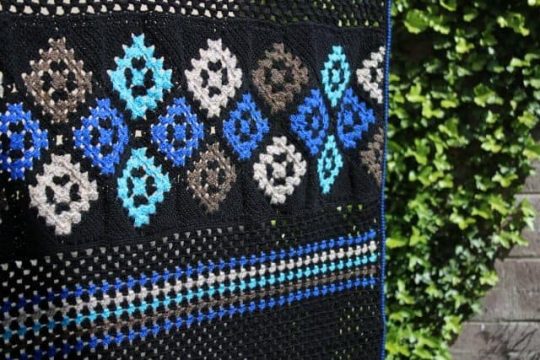
Crochet made with patchwork technique in a panel of squares, half square and filling the spaces between the motifs.
You can make it with any size you prefer, since the number of squares and half squares will determine the finished size.
This crochet blanket came as a Christmas present for a relative, a grandfather. 🙂
I will be sharing the pattern in the blog for free, separated in three parts because it is quite big.
If you prefer, you can buy a pdf, ads free version on Ravelry.

Materials list:
1 color of your choice as primary color plus 4 more colors as secondary colors. The following list shows what was chosen for this design.
. Cygnet DK – Black (6 balls) – primary color
. Cygnet Aran – Harvest (1 ball) – secondary color
. Cygnet DK – Maple – (1 ball) – secondary color
. Cygnet DK – Royal – (1 ball) – secondary color
. Cygnet DK – Lupin – (1 ball) – secondary color
US Hook nº G/6 and US7 (4mm and 4.5mm)
Stitch markers
Tapestry needle
Scissors
Finished size approximately (width x height): In: 45”x54” Cm: 115×138
Difficulty level: Experienced beginner
Crochet abbreviations US:
Chain – ch
Slip stitch – sl st
Single crochet – sc
Half double crochet – hdc
Double crochet – dc
Important notes:
This blanket is made by parts: squares and half squares, sewed and forming a panel. After filling the gap between the motifs, we start building the rest of the piece.
You may want to weave the ends every time you finish one square/half square and at the end of each step. This project has many ends along the way and you want to finish it without being overwhelmed. 🙂
For showing the color being used in each step, black will be substituted by “main color” and the others will be displayed as “secondary color”.
For the instructions on how to fill the gap between the motifs: The ch always counts as a stitch.
Repeat is shown with a * in the beginning and the end of the repetition
Instructions – Making the squares and half squares
STEP 1
Hook nº 4mm (G/6)
Squares: make 22 in total
(If you want to follow the same color pattern):
4 Harvest
4 Maple
8 Royal
6 Lupin
With secondary color, form a magic ring.
Row1: Ch3, work 2 dc into the magic ring, ch2, 3dc, ch2, 3dc, ch2, 3dc, ch2. Pull magic ring closed and sl st to top of ch1 of the ch3. Fasten off. Turn. Change to main color.
Row 2: Ch3, 2 dc into the first ch-2 space, ch2 3dc into same ch2 space. Ch1, 3dc, ch2, 3dc into each ch-2 space around ending with a ch1. Sl st to top of ch1 of the ch3. Fasten off. Turn. Change to secondary color.
Row 3: Ch3, 2dc into the first ch1 space, ch1, *3dc, ch2, 3dc into the next ch2 space. Ch1, 3dc into next ch1 space, ch1 repeat from * all the way around ending with a ch1. Sl st to top of ch1 of the ch3. Turn. Don’t change color.
Row 4: Ch3, work 2 dc into the first ch1 space. ch1, *3dc, ch2, 3dc in next ch-2 space. Ch1, 3dc in next ch1 space. Ch1, 3dc in next ch1 space, ch1 repeat from * all the way around ending with a ch1, Sl st to top of ch1 of the ch3. Fasten off. Turn. Change to main color.
Row 5: Ch3, work 2 dc into the first ch1 space. Ch1, 3dc into next ch-1 space, ch1, 3dc, ch2, 3dc into next ch-2 space, *ch1, 3dc into each of the next 3 ch-1 spaces, ch1, 3dc, ch2 3dc in next ch-2 space, repeat from * all the way around to the last ch-2 space, ch1, 3dc into the last ch-1 space, ch1. Sl st to top of ch1 of the Ch3. Fasten off and weave in ends.
Half Granny Squares/Triangles: make 4 in total
(If you want to follow the same color pattern):
2 Harvest
2 Maple
With secondary color, make a magic ring.
Row 1: Ch3, work 2 dc into magic ring, ch2, 3 dc into magic ring. Pull magic ring tight and sl st to top of ch1 of the Ch3. Fasten off. Turn. Change to main color.
Row 2: Ch3, 2 dc into the top of the first stitch in previous row. Ch 1, 3dc, ch2, 3dc into ch-2 space. Ch1, 3dc into top of ch1 of the Ch3 from previous row. Fasten off. Turn. Change to secondary color.
Row 3: Ch3, 2 dc into the top of first stitch. Ch1, 3dc into next ch-1 space. Ch1, 3dc, ch2, 3dc into ch-2 space. Ch1, 3dc into next ch-1 space. Ch1, 3dc into the top of ch1 of the Ch3 from previous row. Turn.
Row 4: Ch3, 2 dc into the top of the first stitch in previous row. Ch1, 3dc in next two ch-1 spaces. Ch1, 3dc, ch2, 3dc into ch-2 space. Ch1, 3dc in next 2 ch-1 spaces. Ch1, 3dc into top of ch1 of the Ch3 from previous row. Fasten off. Turn. Change to main color.
Row 5: Ch3, 2 dc into the top of first stitch. Ch1, 3dc into next 3 ch-1 spaces. Ch1, 3dc, ch2, 3dc into ch-2 space. Ch1, 3dc into next 3 ch-1 spaces. Ch1, 3dc into the top of ch1 of the Ch3 from previous row. Fasten off and weave in ends.
Step 2:
Sew the motifs with a whip stitch through the back of the loops. If you want to follow this colour pattern, join the motifs as it follows: